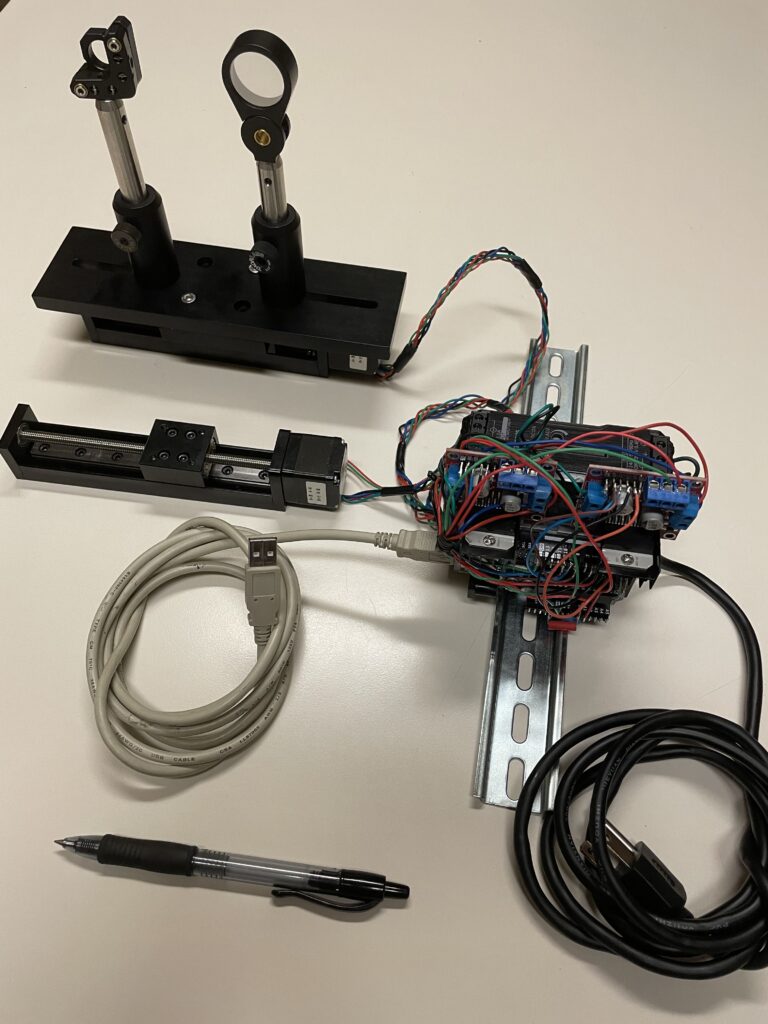
Laplanda Multiple Linear Stages Controller
Application
Convenient interface for controlling multiple stages on stepper motors by using Arduino UNO board. Five fixed positions for each stage and Homing will make the GUI control easy and reliable. This solution suggests up to three stages. The stage used: Linear Rail 50mm / 100mm / 150mm/ 200mm Linear Stage Actuator with Square Linear Rails Mini Slide Table + NEMA 11 Stepper Motor for DIY CNC Router Milling Machine (100mm) – – Amazon.com
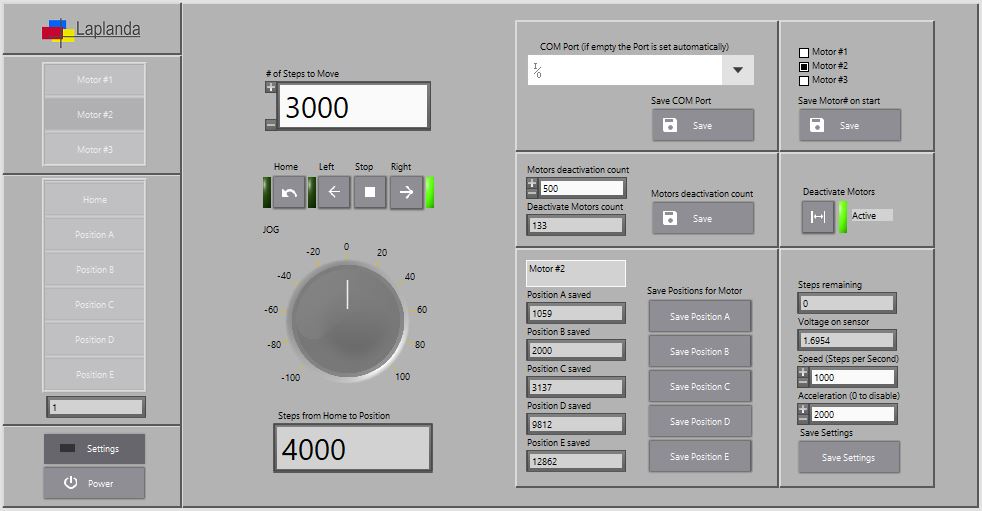
GUI Control and Popup messages
- Chose the Motor# (Linear Stage).
- Push “Home”, then any Position (A, B, C, D, E).
- Push “Settings”.
- Adjust positions by Left/Right/ Stop/ Pause/ Jog.
- Save Position for Each position.
- If the any Operator error, the PopUp message may arise.

- Adjust speed and acceleration and save.
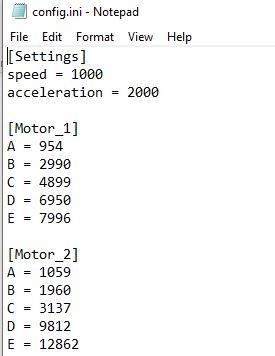
- The savings performs to the configuration file located in root “config” folder.
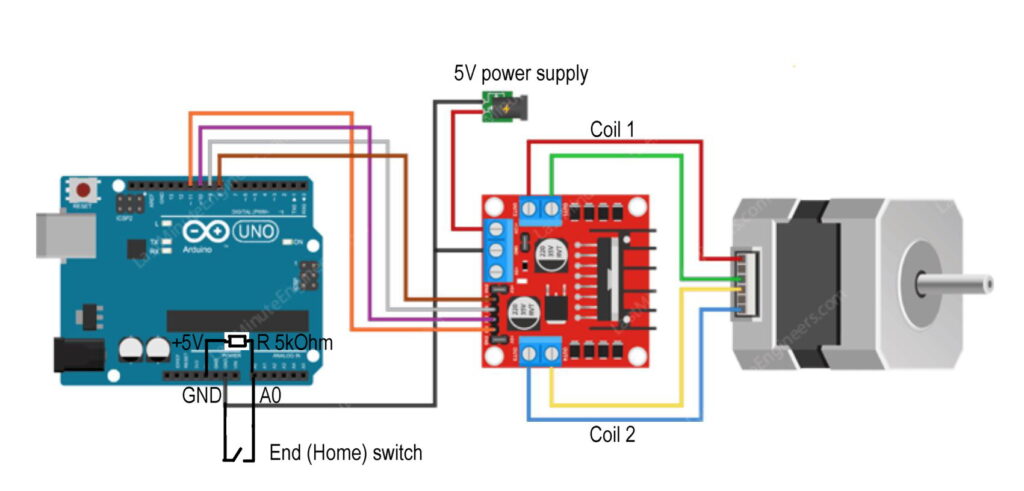
Schematics
This diagram is fow 4-Wire NEMA11 Stepper motor with 5V power supply and 0.6A max current. For current application the digital pins are used:
- Motor#1 Dig Pin 5, 6, 10, 11
- Motor#2 Dig Pin 3. 4, 8, 9
- Motor#3 Dig Pin 2, 7, 12, 13
L298N Stepper Motor Driver Controller is used: Amazon.com: TIMESETL 5Pack L298N Stepper Motor Driver Controller Board Dual H Bridge Module for Arduino Electric Projects : Electronics
Add any type of switch (normally open) to control the stop (Home) position. Connect to Arduino UNO analog pins for Motor#1, Motor#2 and Motor#3 to Pin A0, A1, A2 accordingly
Use the resistor 3-10kOHm for High Level on pin (see schematics)
Specification
Travel range: 3.925’ (100mm)
Accuracy: 0.0035’ (0.1mm)
Dynamic load capacity – up to 2kg
Acceleration – up to 2500 mm/s.sq
Speed – up to 50 mm/s
Motor type – stepper NEMA 11 (0.6A, 5V)
Driver – 2A; 12-48V
Controller – full steps per second: 2000
Color – black (black aluminum anodized)
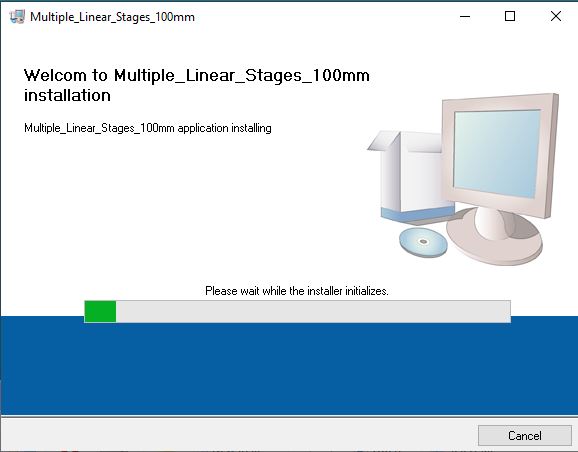
Software installation
Download and unzip file:

Install the software by clicking to “setup.exe”
Follow the instructions.
How to run:
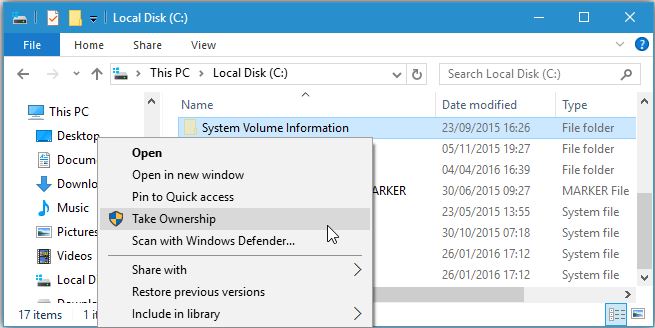
After the installation, please take the folder under possession. To make this the application “Add Take Ownership to Context menu.reg” can be used. This application is located in the installed folder. Just run “Add Take Ownership to Context menu.reg” and then from Context menu push “Take Ownership”. This is requiring because the C drive is usually protected from writing, but the Config file requires the Position saving to the file, which is located in “config” folder.
And run the .exe file:
C:\Program Files (x86)\Multiple_Linear_Stages_100mm_012\Multiple_Linear_Stages_100mm_012.exe
For programmers
Source code
The source code is written on LabVIEW 2017 and uses OpenG and MGI functions adds-on. Load this with VI Package manager if require. The Installation package includes all necessary drivers and is working for Win 7, 10 OS.
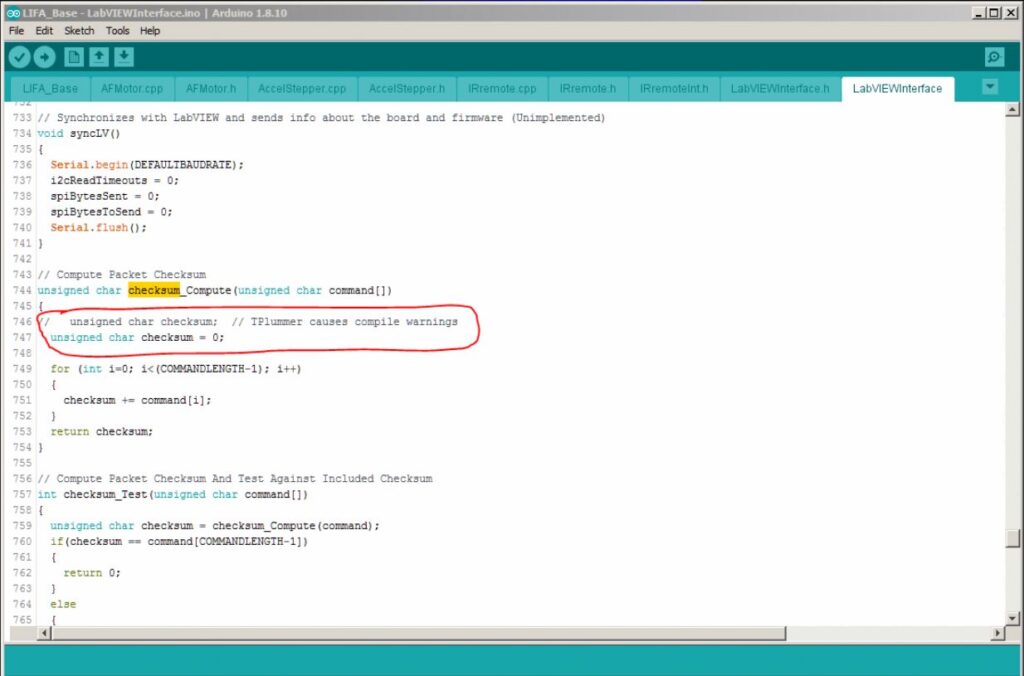
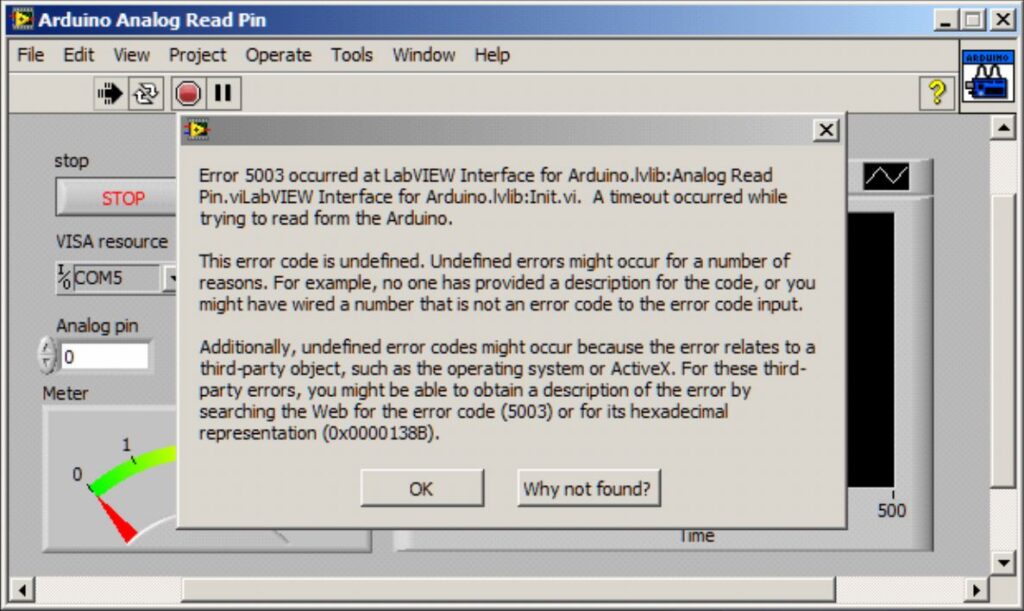
For LIFA_Base Arduino firmwares check this:
Title: LIFA com IO fails with 5003 (timeout) error
By: Thomas Plummer
Date: NOV 16, 2019
PROBLEM: Arduino IDE versions later than 1.8.3 will compile and upload LIFA without errors though some warnings are generated. One warning is important to fix: uninitialized variable – checksum. When Arduino Analog Read Pin is run here is the failure: